Layout instructions square buttons
Step 1
Draw the 3 square lines with rounded corners according to the sizes in table underneath
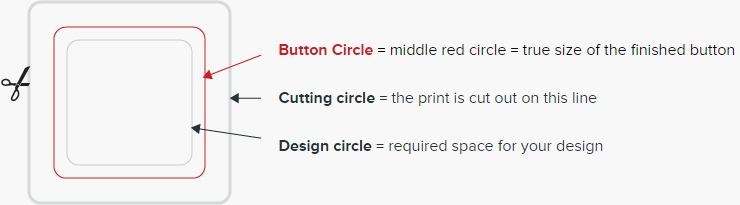
| Line finished button size | 30mm | 40mm | 50mm |
| Design space | 26mm | 37mm | 46mm |
| Cutting line | 42mm | 52mm | 62mm |
Step 2
Place your illustration/photo/text within the square lines. Always let the background colour continue to the edge of the outer cutting line!
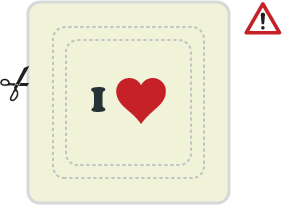
During the production of a button a mimimal shift of the print is always possible. That’s why we advise you to to keep your design/text/logo well within the size of the design line. Please note that when there is a concentric circle/text line, or a square design, or where text or design are running around the edge of the badge, we are not able to guarantee that your button-badge will look central. We bear no responsibility in that area.
Step 3
Remove the 2 inner square lines = the design line and the button line. Just keep the outer cutting line. Your design is finished now.
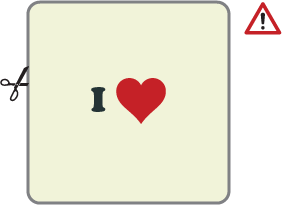
If your design has a white or light coloured background, pls use a black coloured outer cutting line so that we can see clearly where to cut out.
Step 4
Save your design on 1/1 as a PDF or EPS file (min. 300 dpi). If you send us a PDF-file, we strongly recommend you to convert your text characters to outlines first (line drawing).
Printing in pantone colours is always possible. So pls check if your colours are made in the correct pantone references or in CMYK. It’s also advisable to confirm the required pms colour references separately with your order.
Mail your file to info@belgianbuttoncompany.be. If you have a reproduction in Pantone colors, please mention the PMS codes separately in your e-mail.
Do not hesitate to call us for further informations on +32 (0)476-960 736
We are always at your disposal for extra help.